

_edited_edited.jpg)
DIY Micro Cement Counters
- bekahseavers
- Feb 16, 2023
- 4 min read
I wanted white stone counters to contrast the beige cabinets in our #HomeOnFourth Kitchen. We've been trying to complete our renovation on a budget, so I was on the hunt for a "look for less" option. We looked into concrete counters but could not find white cement locally, and ordering online meant large shipping fees due to the weight of the cement bags.
Naturally, I began googling white cement to try and find a cost affective option. I stumbled upon a few YouTube videos using micro cement used for showers and counters - though the creators were from Europe and Austrailia. I knew we had to give it a shot!


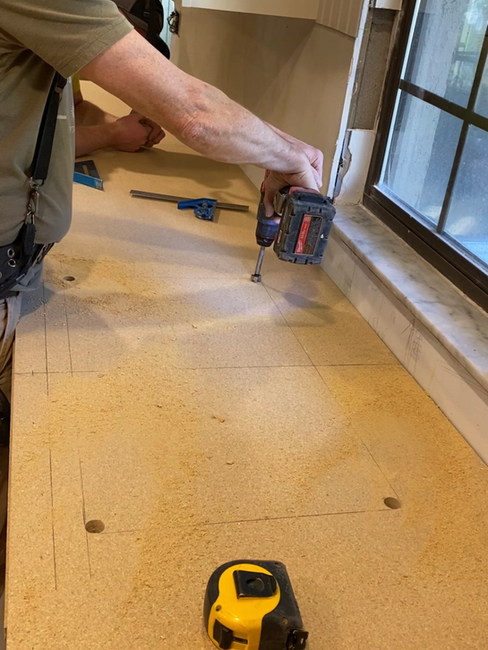
Micro-cement requires a substrate, so we decided to use pressed board (typically used with formica counters) because it was a very smooth and consistent surface. We used two layers of 3/4” thick pressed board on the perimeter counters, and one layer of plywood with one layer of pressed board on the peninsula to support the weight of the countertop overhang.
Once all the substrate was installed, we cut the holes for the kitchen sink and faucet. We had already purchased the sink and faucet so we were able to use them as a template. We purchased a 30" sink for a 30" cabinet, so we had to cut down the sides of the sink cabinet to make sure we'd be able to install the sink after the counters were finished. It took some trial and error but since we had the physical sink we were able to guarantee the sink could be installed after the fact, and the cut down sides will only be visible inside the cabinet - a trade off I was willing to make to optimize the sink!


Up next was waterproofing! Cement is a very porous stone so we decided to waterproof the pressed board to help prevent the substrate from molding or deteriorating. We applied Mapei’s aquadefense liquid membrane with a foam roller. We made sure to coat the undersides of the kitchen sink and the underside over the dishwasher since those areas will have heavy water usage. The roller did leave a texture to the waterproofing that a trowel or putty knife probably would have left more smooth. If we were doing it again I think we would try a trowel method.


For the micro-cement we used Ardex feather finish. This is a fast drying cement typically used to level out surfaces, so we found dividing up the 10 pound bag into 2 and even 3 small batches made it the easiest to work with. We used about 1 quart of water per 1/3 of the bag. The goal was to have a creamy peanut butter consistency.


We practiced on the smaller coffee bar area to start since the other two stretches of counter were much larger. After we finished the first layer of cement on all the surfaces we found buttering up the edges and allowing them to stiffen before pouring the top allowed us to form clean square edges and corners. For the second coats we mixed a third of the 10 lb bag to do all of the edges. Once the cement began to stiffen up we smoothed the edges over before pouring the top with a slightly thinner batch (1/3 bag with 1.5 quarts of water).


We sanded all of the counters with a 100 grit sandpaper after the first coat of cement had fully hardened to maintain a smooth surface. Once the final layer of cement had fully dried we carefully sanded all the surfaces with a 300 grit sandpaper to give us a silky smooth surface. I used an orbital sander on the fastest settings on the surface, and the slowest setting on the edges to ensure we didn't take off too much cement. If your orbital does not have an adjustable speed I would recommend hand sanding the edges.


Once all the surfaces were nice and smooth and completely dust free we were able to apply the sealer. We went with a 511 sealer which creates a barrier that prevents the stone from absorbing liquids. The sealer left the counters feeling silky smooth, but maintained the color and matte finish of the cement. It is also listed as food safe which is important for kitchen use.


The materials were super budget friendly, and because we were able to do it ourselves it saved us a ton! Overall, I’m so happy with how the counters turned out! If you decide to give it a shot, please let me know! And be sure to check out THIS instagram reel to see all the steps in action!

LINKS :
Kitchen Sink -- https://amzn.to/3S0Aryz
Mapei Waterproof -- https://www.lowes.com/pd/MAPEI-Mapelastic-Aquadefense-1-Gallon-Liquid-Membrane/5014036803
Micro-Cement: Ardex Feather Finish -- https://amzn.to/3IrtoeV
511 Impregnator Sealer & Applicator -- https://amzn.to/40WA0JA
Tools We Had on Hand --
6" Foam Rollers & Roller Covers
Corded Dril & Mixing Bit
3 - clean and empty 2 gallon buckets for dividing and mixing the cement - we reused old paint buckets
1-2 5 gallon buckets filled with water & Tile Sponges for cleaning all the tools
Putty knives - multiple sizes


Comments